


West Coast Online
Windows NT 4.0 Setup.
Section 2
Dial-Up Networking
Step 1: Find and Open Dial-Up Networking.
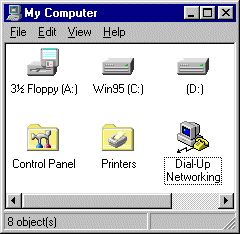 After your computer has been restarted, you are ready to add a phonebook entry into Dial-Up Networking. Open the My Computer icon on your desktop then open the Dial-Up Networking icon.
If you have been in Dial-Up Networking before, then the window that appears will be like the one in Step 2a, otherwise you will get a window like Step 2b. Just go to the step that matches your window.
|
Step 2a: Been In Dial-Up Networking Before.
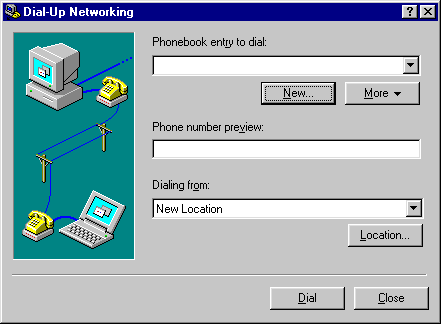
If you've been in Dial-Up Networking before, you should see this window when you open the icon. Click on the New button and skip to Step 3.
|
Step 2b: Not Been in Dial-Up Networking Before.
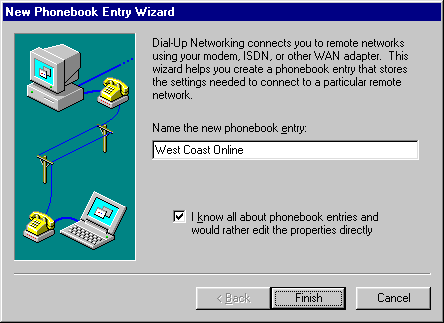
If this is your first time in Dial-Up Networking, this will be the first Window you see. Name your phonebook entry West Coast Online, and put a check in the box below. Click Finish to move to Step 3.
|
Step 3: Begin Editing Phonebook Entry.
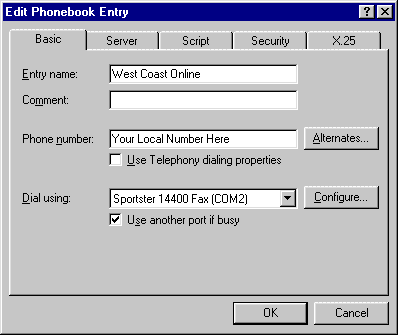 You'll start on the Basic tab in which you will want to fill in the Entry name with West Coast Online. In the Phone number space, type in the local West Coast Online dialup number your want to use. Click on the Server tab and move on to the next step.
|
Step 4: The Server Tab.
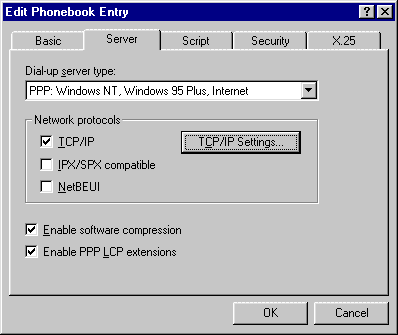 On the Server Tab, set the Dial-up server type to PPP:Windows NT, Windows 95 Plus, Internet. Put a check mark in TCP/IP only. Make sure that the bottom two checkboxes are checked. Now click on the TCP/IP Settings button.
|
Step 5: The TCP/IP Settings Window.
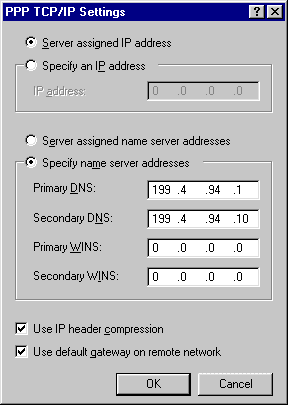 When the TCP/IP Settings window comes up, make sure that you have Server assigned IP address marked as well as Specify name server addresses. Put in 199.4.94.1 for Primary DNS and 199.4.94.10 for Secondary DNS. Put a check in both Use IP header compression and Use default gateway on remote network. Click on OK to return to the window in Step 4, then click on the Script Tab to move to the next Step.
|
Step 6: The Script Tab.
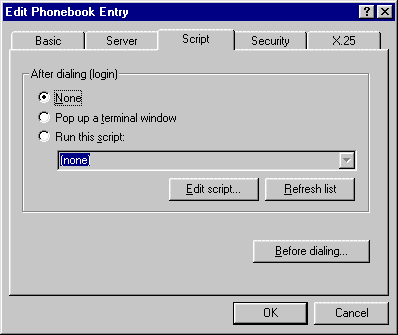 On the Script Tab, simply mark None because no script is needed. Next click on the Security Tab.
|
Step 7: The Security Tab.
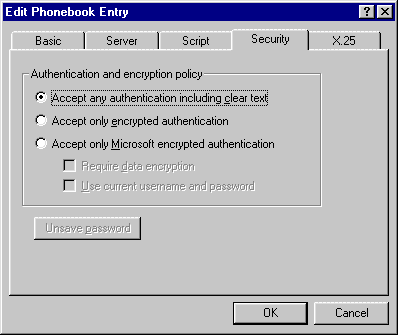 On the Security Tab, mark Accept any authentication including clear text. That's all the editing that needs to be done here. Click on OK to save the changes and return to the window in Step 2a. On that window click on the Dial button.
|
Step 8: The User name and Password Screen.
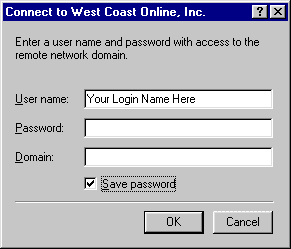 The first time you try to connect with West Coast Online, this screen will appear. You need to enter your West Coast Online login name in all lower case in the User name field. Enter your password in the Password field. Leave the Domain field blank. You can put a check in Save Password so that you never have to enter it again. Finally click on OK to begin dialing.
|
Back to Section 1


